2. Understanding Installation Restrictions with AppLocker
Occasionally, when you are attempting to install an application, you might receive an
error such as the one shown in Figures 4 or 5.
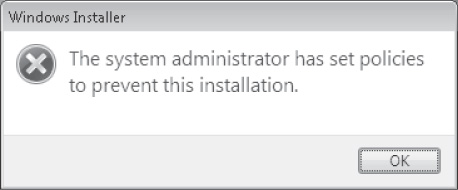
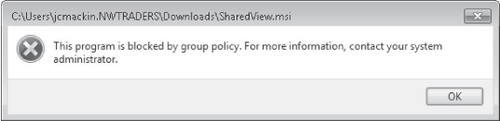
If you see such a message, the AppLocker or SRP feature has been used to prevent the
application from being installed. Both technologies are available in Windows 7 and Windows
Server 2008 R2. AppLocker is essentially a new and improved version of SRP, but SRP is still
included in these newer operating systems for compatibility with networks running older
versions of Windows.
As with SRP, you configure AppLocker through Group Policy. To locate AppLocker, open a
Group Policy Object (GPO) and navigate to Computer Configuration\Policies\Windows
Settings\Security Settings\Application Control Policies\AppLocker, as shown in Figure 6. (In Local Security Policy, the path is simply
Security Settings\Application Control Policies.)
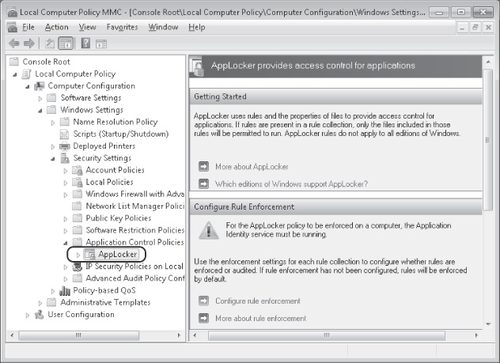
You can see that the container for AppLocker (Application Control Policies) is found
immediately below SRP.
The next section introduces AppLocker and describes the differences between it and
SRP.
2.1. Overview of AppLocker
2.1.1. Overview of AppLocker
Overview of AppLocker
AppLocker is a new feature in Windows 7 and Windows Server 2008 R2. It allows
administrators to restrict the programs that users can run or install in your
organization.
AppLocker resembles SRP in a number of ways. First, you configure both AppLocker and
SRP in a GPO. Also like SRP, AppLocker allows you to create rules specifying an application
to which you want to allow or deny access. Finally, as in SRP, in AppLocker you can define a
program by specifying—among other methods—a hash of or a path to its
file.
AppLocker, however, provides the following important improvements over SRP:
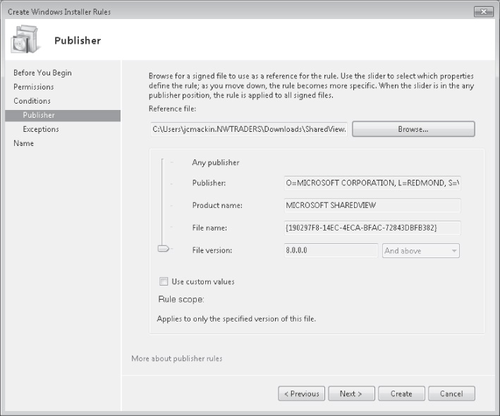
Publisher rule condition
In AppLocker, you can specify a program by extracting information from its digital
signature, as shown in Figure 7. You can
then use part of or all of this publisher information to define the programs you want to
allow or deny. This publisher condition essentially replaces Certificate Rules in
SRP.
Using publisher information from a digital signature is by far the best way to
specify an application in AppLocker. First, you can use this publisher information to
create rules at various levels of specificity: You can make the rule apply to the
publisher in general, to any version of the particular application, or to specific
versions of the application (including all previous or future versions). Second, the
publisher condition solves a key problem with SRP: In SRP, there is no comparable way to
restrict access to an application through multiple updates. If you specify a path to an
application that you want to restrict, users can simply move the program to a new path to
avoid the restriction. If you specify a hash for the application, you have to create a
new rule every time the application is updated.
AppLocker blocks all programs that are not specifically allowed
In SRP, rules by default are used to block access to chosen applications. However,
within any company network, the number of applications that you want to block typically
far exceeds the number that you want to allow. AppLocker accounts for this disparity by
locking all applications that are not allowed. More specifically, AppLocker rules are
enabled for one of four file type (executables, Windows Installer programs, scripts, or
DLL files) when you first create a rule for that file type. Then, when AppLocker is
enabled, all applications of that file type are locked if they are not allowed by a rule.
To prevent system lockouts, AppLocker provides the Create Default Rules and Automatically
Create Rules options. These options create allow-type rules for most applications. You can
then create additional rules to change this default configuration.
Assign Rules to Specific Users and Groups
In AppLocker, you can create rules that apply to everyone or only to specific users
and groups. In SRP, you can create only rules that apply to everyone.
Exceptions
AppLocker enables you to create a rule with an exception. For example, you can create
a rule that allows any application to run except a specific .exe file. This feature is not
available in SRP.
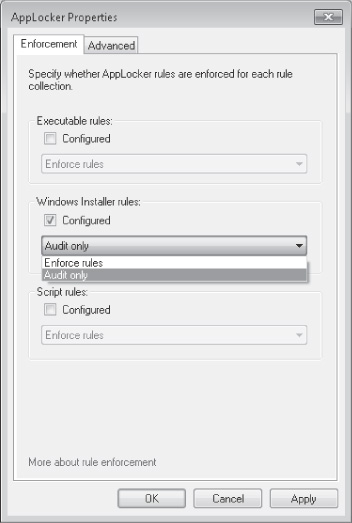
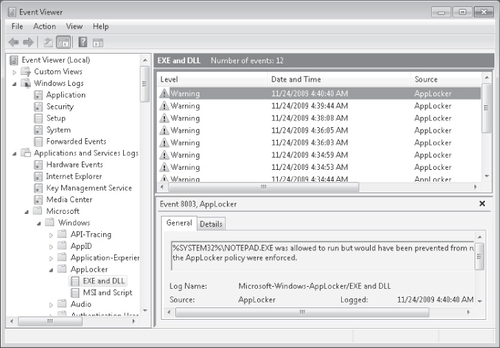
Audit-only mode
Unlike SRP, AppLocker includes an audit-only mode. Through auditing, you can test
your configuration without enforcing AppLocker rules. When you configure AppLocker to
audit AppLocker rules for a chosen file type (such Windows Installer programs), events are
written to the event log when AppLocker would normally block access to that
application.
Audit mode is configured in the properties of the AppLocker node in a GPO, as shown
in Figure 8. Audit events as they appear
in Event Viewer are shown in Figure 9.
Import and export rules
In AppLocker, you can export and import rules to and from other computers, which
allows administrators to copy and edit rules easily.
AppLocker Availability and Compatibility
AppLocker rules are enforced on computers running only Windows Server 2008 R2, Windows
7 Ultimate, and Windows 7 Enterprise. AppLocker rules are not enforced on computers running
other versions of Windows, such as Windows Server 2008, Windows 7 Professional, or Windows
Vista.
In a GPO containing only SRP rules, the rules are enforced on all computers running
Windows, including those running Windows Server 2008 R2, Windows 7 Ultimate, and Windows 7
Professional. However, if a GPO contains both SRP rules and AppLocker rules, these same
three operating systems read only the AppLocker rules. The SRP rules are applied to
computers running other Windows operating systems.
AppLocker Relies on the Application Identity Service
AppLocker rules are enforced on eligible clients only when those clients are running
the Application Identity Service. By default, this service is not configured to start
automatically on computers running Windows 7. If you want to enforce AppLocker rules,
therefore, you should use Group Policy to set the Startup Type parameter to Automatic for
the Application Identity Service.
2.1.2. PRACTICE: Preventing Software Installation with AppLocker
In this practice, you download an .msi file from the Microsoft Web site and then prevent
installation of that .msi file through AppLocker.
EXERCISE 1 Obtaining an .msi File
In this exercise, you download the file SharedView.msi from the Microsoft Download
Center. You then begin a new installation to test its functionality.
Log on to the domain from the client running Windows 7 (Computer1) as a domain
administrator.
In Windows Internet Explorer, visit the Microsoft Download Center at http://download.microsoft.com. Search for the file "SharedView.msi," and save it
to your Downloads folder on Computer1. (If you do not have Internet access from Computer1,
you can download the file from another computer and copy it to Computer1.)
Note:
YOU CAN USE ANY .MSI FILE
Although we will use the file SharedView.msi in this exercise,
you can replace this file with any other that you can locate and copy to the Downloads
folder on Computer1.
Share the Downloads folder by granting Read access to Everyone. To perform this step,
right-click the Downloads folder, choose Share With on the shortcut menu, and then click
Specific People. In the File Sharing window, type Everyone,
click Share, and then click Done.
Open the Downloads folder and double-click SharedView.msi to begin the
installation.
If an Open File-Security Warning message box appears and asks if you want to run the
file, click Run.
The first page of the Microsoft SharedView Setup wizard appears. The fact that the
wizard has started indicates that the .msi file is not blocked.
Click Cancel and then Yes to close the Microsoft SharedView Setup wizard.
EXERCISE 2 Configuring AppLocker to Block an .msi
In this exercise, you create a GPO, and then, in the new GPO, you create the default
rules for AppLocker in the Windows Installer rule collection. Finally, you create a new
Windows Installer rule that denies SharedView.msi.
Switch to the domain controller (DC1), and log on as a domain administrator.
Open Group Policy Management, which is available through the Start menu in the
Administrative Tools folder.
In the Group Policy Management console tree, locate and expand the Domains container,
and then select the domain (Nwtraders.msft) node.
Right-click the Nwtraders.msft node, and then click Create A GPO In This Domain, And
Link It Here in the shortcut menu.
In the New GPO dialog box, type AppLocker Block
SharedView.msi, and then click OK.
In the Group Policy Management console, in the details pane, right-click the AppLocker
Block SharedView.msi GPO, and then click Edit. The Group Policy Management Editor
opens.
In the Group Policy Management Editor console tree, navigate to Computer
Configuration\Policies\Windows Settings\Security Settings\Application Control
Policies\AppLocker\Windows Installer Rules.
Select and then right-click the Windows Installer Rules node, and then click Create
Default Rules from the shortcut menu.
In the details pane, three new rules appear. These rules allow everyone to run all
digitally signed Windows Installer files, everyone to run all Windows Installer files
(signed or not) in the %Systemdrive%\Windows\Installer directory, and administrators to run
all Windows Installer files without exception.
Right-click the Windows Installer Rules node, and then click Create New Rule on the
shortcut menu. The Before You Begin page of the Create Windows Installer Rules wizard
opens.
Read all of the text on the page, and then click Next.
On the Permissions page, click Deny, and then click Next.
On the Conditions page, leave the default selection of Publisher, and then click
Next.
On the Publisher page, click Browse.
In the Open window, in the File Name field, type \\computer1\users\username\Downloads\SharedView.msi, and then click Open. For the variable
username, specify the name of the account that you used in Exercise 1
to copy SharedView.msi to the Downloads folder. On the Publisher page, the information from
the digital signature in the .msi file has populated the gray fields next to the
slider.
Raise the slider two notches so that it is positioned next to Product Name. Next to
the slider, MICROSOFT SHAREDVIEW still appears in the associated field, but the two fields
beneath contain only an asterisk ("*").
On the Exceptions page, click Next.
On the Name And Description page, type Block
SharedView.msi in the Name text box, and then click Create. The new Deny rule now
appears in the details pane.
In the Group Policy Management Editor console tree, navigate to Computer
Configuration\Policies\Windows Settings\Security Settings\System Services.
In the details pane, double-click to open the Application Identity service. The
Application Identity Properties dialog box opens.
In the Application Identity Properties dialog box, check Define This Policy Setting,
click Automatic, and then click OK. Clients need to run this service for AppLocker to
work.
Close the Group Policy Management Editor console and the Group Policy Management
console.
Switch to Computer1, and then restart Computer1.
EXERCISE 3 Testing the Configuration
In this exercise, you test the results of implementing the new GPO that you created in
the last exercise.
After Computer1 has finished restarting, log on to the domain from Computer1 as a
domain administrator.
Open your Downloads folder, and then double-click SharedView.msi.
If an Open File-Security Warning message box appears and asks if you want to run the
file, click Run.
A Windows Installer warning message appears, indicating that the system administrator
has set policies to prevent this installation.
Click OK to close the message.
Return to DC1. In the Group Policy Management console tree, locate the GPO named
AppLocker Block SharedView.msi.
Right-click the AppLocker Block SharedView.msi GPO, and clear Link Enabled on the
shortcut menu. This step effectively disables the policy.